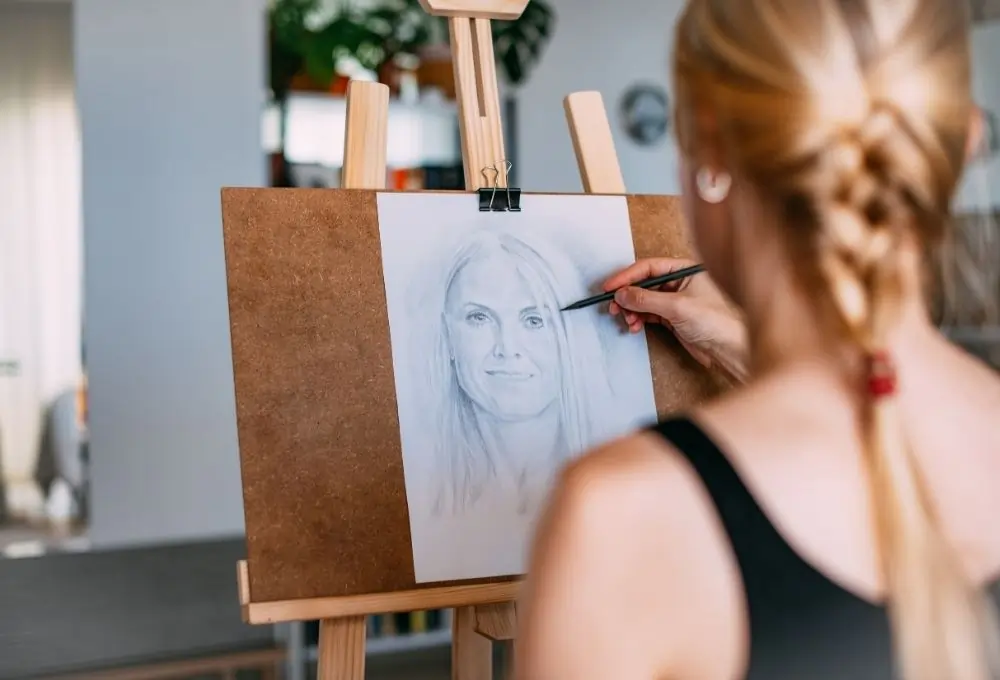
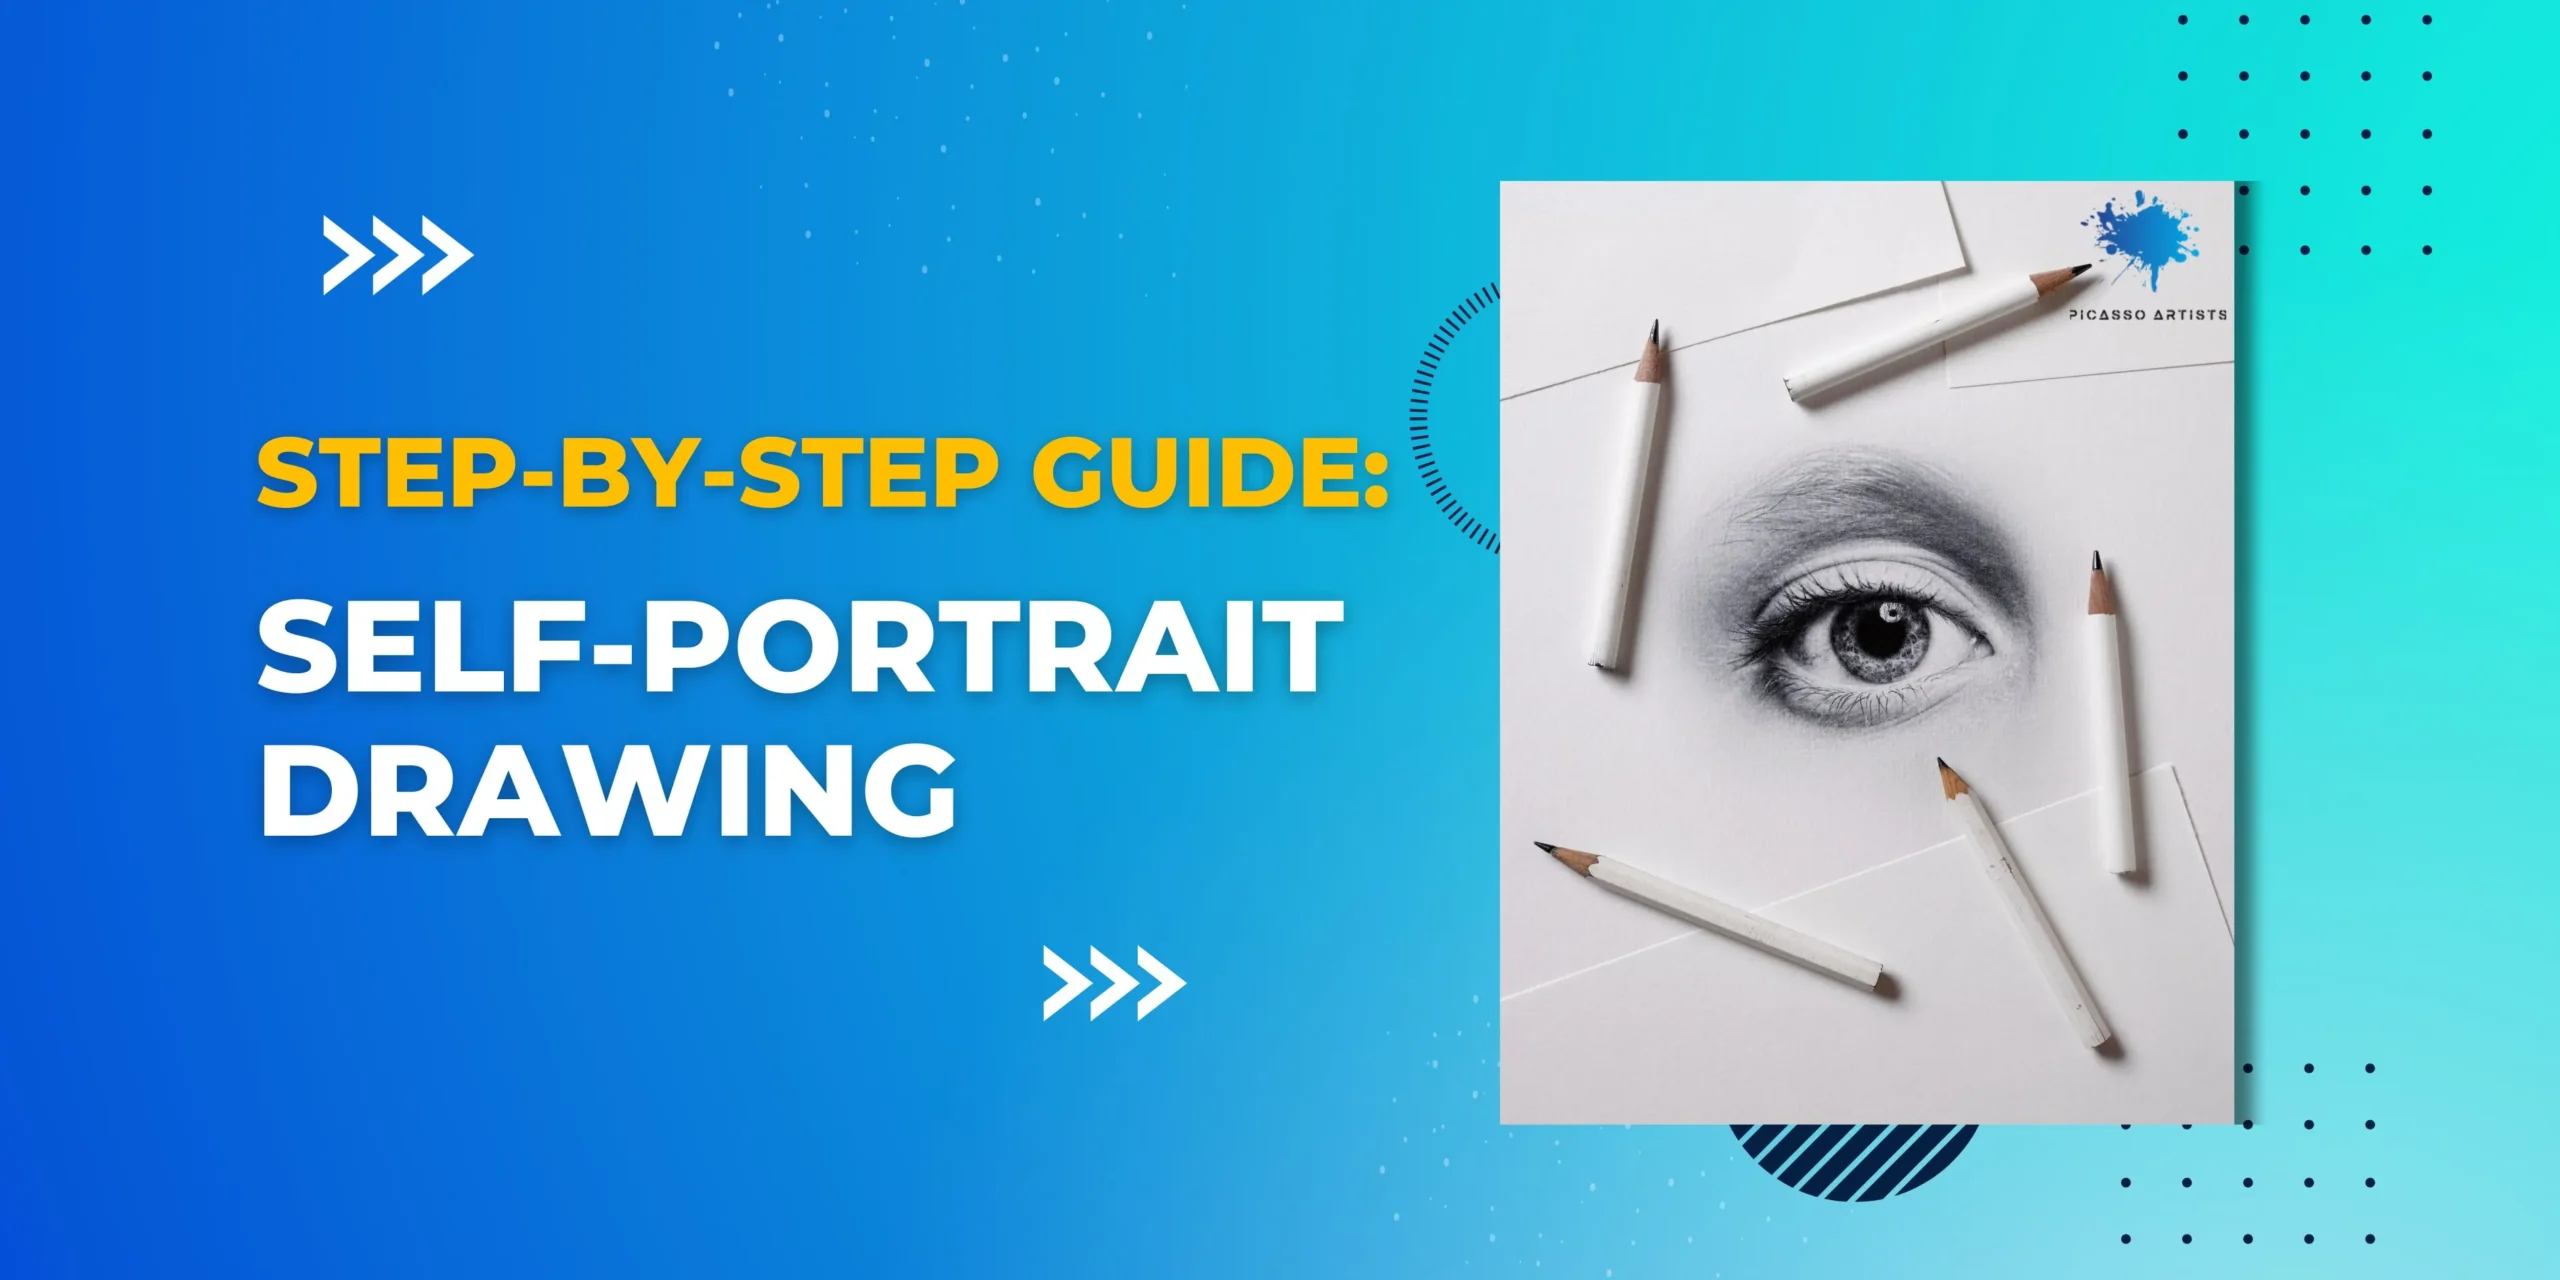
Looking in the mirror can be powerful—but drawing what you see? That’s a whole new level of self-expression. Whether you’re an art student, a curious beginner, or just looking for a creative way to reflect on yourself, learning how to draw a self-portrait is a rewarding experience.
In this step-by-step guide, we’ll walk you through the basics of drawing a self-portrait—no prior experience needed!
Why Draw a Self-Portrait?
A self-portrait is more than just a drawing of your face—it’s an engaging artistic exercise that sharpens your observation skills and strengthens your understanding of facial proportions, symmetry, and detail. As you carefully study your features, you begin to notice subtle nuances—like the curve of your jaw, the shape of your eyebrows, or how light and shadow play across your skin. This attention to detail not only improves your drawing technique but also enhances your ability to capture the essence of any face.
Beyond the technical benefits, drawing a self-portrait is a powerful tool for self-awareness and creative expression. It invites you to slow down, reflect, and connect with your identity in a meaningful way. Whether you choose a realistic or abstract style, each self-portrait becomes a personal story—one that reveals how you see yourself and how you feel in the moment. It’s both a meditative process and a unique form of self-discovery.
What You’ll Need
✏️A mirror (or a clear selfie photo)
✏️Sketching pencil (HB or 2B recommended)
✏️Eraser
✏️Sketchbook or drawing paper
✏️Optional: Ruler, blending tools, colored pencils or pens
Step-by-Step Guide to Drawing a Self-Portrait
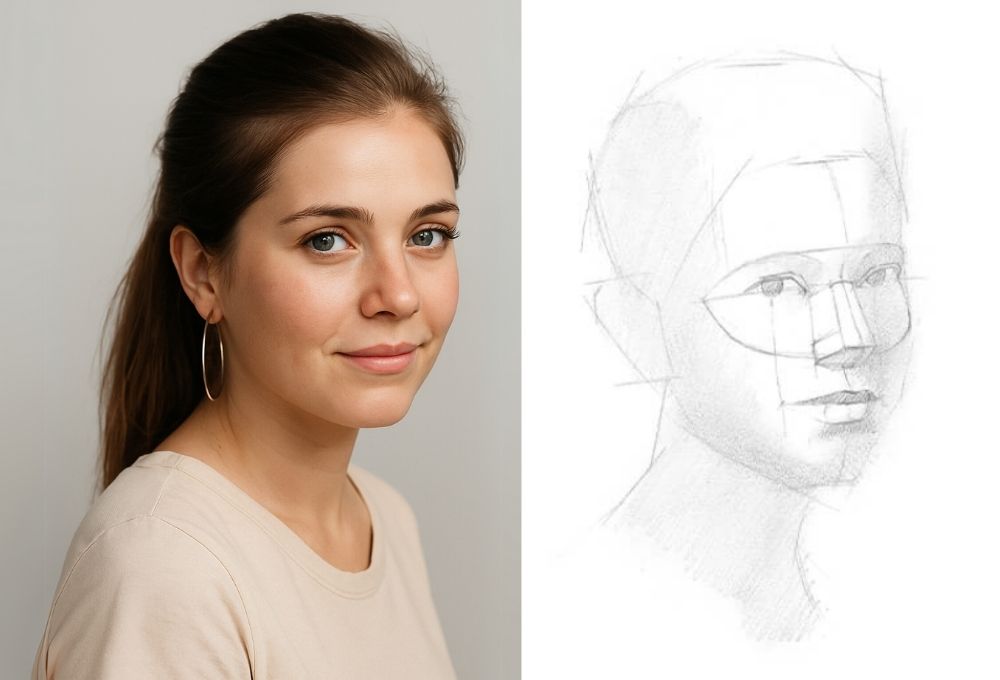
Step 1: Observe and Frame Your Face
Before picking up your pencil, take a few minutes to closely observe your reflection or reference photo. Look at the overall shape of your head and how your features are positioned. Lightly sketch a vertical line to mark the center of the face, then add a soft oval shape for the head, adjusting for any tilt or angle.
Step 2: Divide the Face
To keep proportions accurate, divide the face vertically into three equal parts:
Hairline to eyebrows
Eyebrows to the bottom of the nose
Bottom of the nose to the chin
This simple structure helps you place facial features with better accuracy. These sections also roughly match the height of the ears.
Step 3: Place the Eyes and Ears
Draw a horizontal line halfway between the top of the head and the chin—this is your eye line. Sketch basic almond shapes for the eyes along this line, keeping one eye-width of space between them. Position the ears so that the tops align with the eye line and the bottoms with the base of the nose.
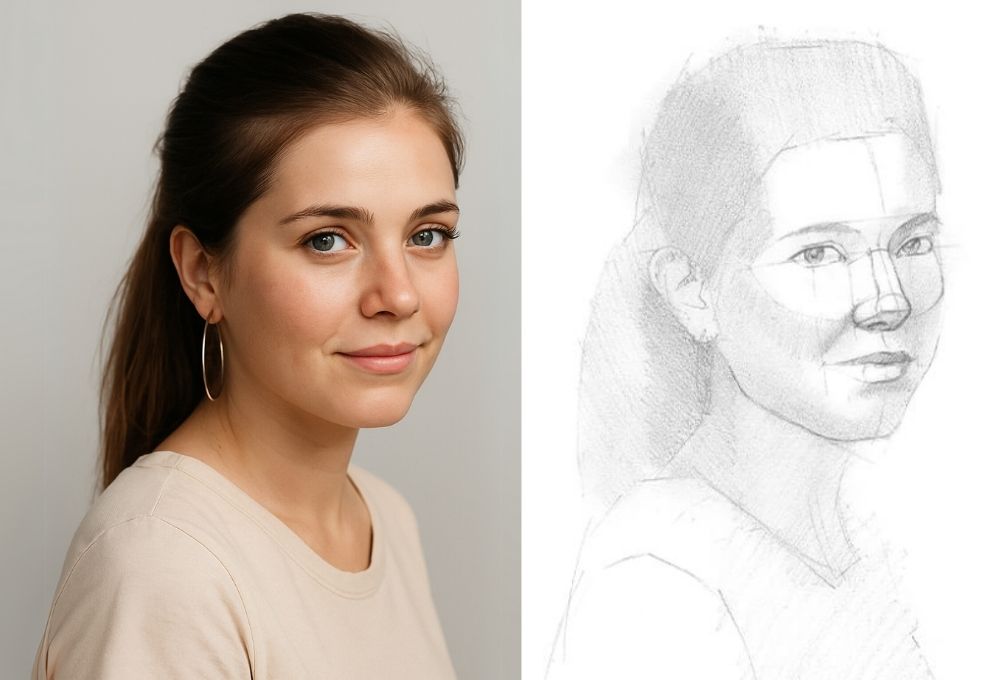
Step 4: Define the Features
Begin outlining key facial features:
Add pupils and eyelids inside the eye shapes, checking symmetry and angle.
Sketch the eyebrows above, observing their thickness and curvature.
Begin shaping the cheekbones and hint at the neck to support the head structure.
Add a centerline if your head is turned—it helps maintain facial balance.
Step 5: Build the Nose and Mouth
To find the width of the nose, draw vertical lines down from the inner corners of the eyes. The bottom of the nose falls at the second horizontal division. For the mouth, divide the space between the nose and chin in half; this gives you the line for the lower lip. Use subtle curves to shape the lips and align the corners with the center of each eye.
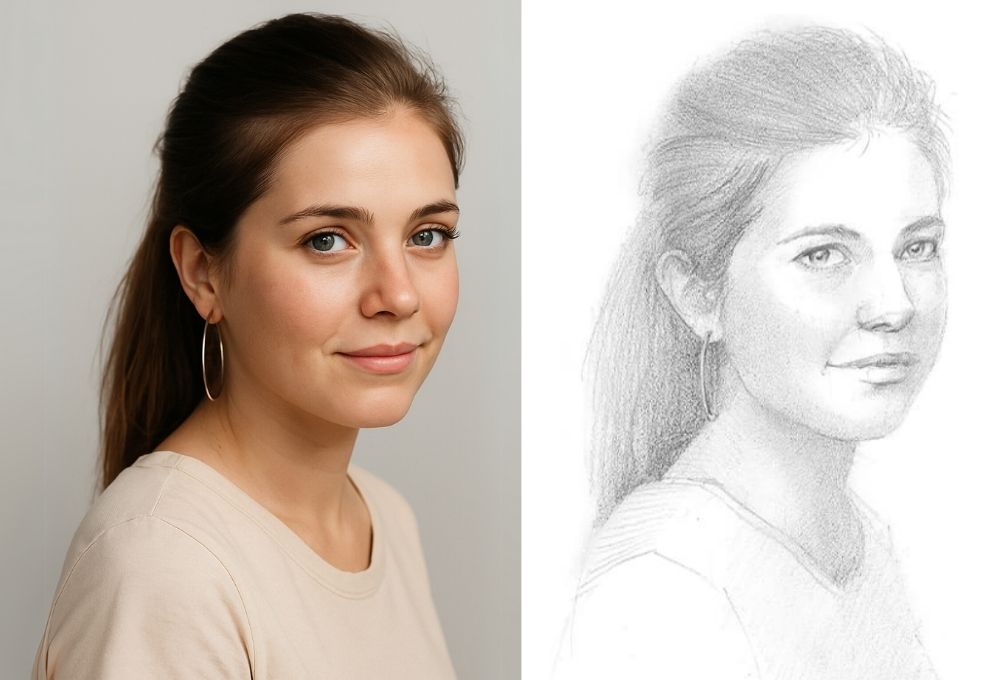
Step 6: Add Volume and Shadows
Now, bring dimension into the sketch. Lightly shade the areas under the eyebrows, along the sides of the nose, under the nose, and beneath the lips. Shade one side more if you’re using a single light source. The upper lip and neck often fall in shadow. Take time to reflect on how light interacts with the face.
Step 7: Refine and Add Texture
Begin refining all elements: outline the jaw, smooth the ear shape, and soften nose and cheek contours. Now’s also the time to begin developing texture in the hair, eyebrows, and eyelashes. Observe how strands of hair flow—whether curly, straight, or wavy—and sketch them in layers for depth.
Step 8: Final Touches and Expression
Look closely at what makes your face unique—eye shape, dimples, full lips, or freckles. Deepen contrast by darkening shadows, softening transitions, and enhancing highlights. Add finishing touches to hair and skin texture to bring your portrait to life. Don’t forget to erase any unnecessary guidelines.
Tips for Beginners
🎨Don’t aim for perfection: Aim to capture your expression and uniqueness.
🎨Practice regularly: The more self-portraits you draw, the better your observation and technique will become.
🎨Try different styles: Realistic, abstract, cartoon—explore what feels right for you.
🎨Be patient with yourself: It’s a self-portrait, not a passport photo. Let it reflect your artistic journey.
Bonus Idea: Add Personality!
A great self-portrait goes beyond accuracy—it tells a story. One of the best ways to do this is by incorporating personal elements that reflect your identity, interests, or emotions. Think about adding your favorite colors, meaningful objects, patterns, or symbols that represent something important to you—like a musical instrument, a book, a pet, or even a specific piece of clothing. These subtle (or bold!) additions can help convey your personality and make your artwork stand out as uniquely yours.
You can also play with the background or setting of your portrait to add context. Are you drawing yourself in your favorite place? Surrounded by things you love? Or maybe in an imaginative world that reflects your mood or dreams? These creative choices transform your drawing from a simple face sketch into a rich, visual narrative. Remember, your self-portrait is your canvas—use it to express not just how you look, but who you are.
Picasso Artists: Portrait Workshops for All Ages and Levels
At Picasso Artists, we offer a wide range of engaging art workshops designed for everyone—from curious kids to passionate beginners and seasoned artists. Whether you’re exploring sketching for the first time or looking to refine your painting techniques, our expert-led sessions provide the perfect environment to grow your skills. Our workshops are tailored to suit all levels, offering step-by-step guidance, creative freedom, and hands-on learning. With a focus on both fun and artistic development, Picasso Artists is the ideal space to unlock your creativity and express yourself through art.
Final Thoughts
Drawing a self-portrait is more than a technical challenge—it’s an artistic mirror that reveals how you see yourself. Whether it’s your first time sketching or you’re building your portfolio, this creative exercise will help you grow both as an artist and as a person.
So grab your sketchbook, look in the mirror, and start drawing—you may be surprised by what you discover.